Entering the Stocktake Count - Multiple Bins
Multiple bin locations is a configurable feature of Micronet that allows items to be recorded in more than one bin location within the one warehouse. Using multiple bin locations allows for stocktakes to be performed by location instead of by item. To do this, you must select Bin Number in the Processing Order field when you create the stocktake batch.
|
|

|
Warning
You cannot continue to trade while conducting a multi bin stocktake. The stocktake must be completed and all stocktake batches posted before resuming trade. If transactions are processed during the stocktake, it will cause a GL variance which will need to be journalled.
|
To perform a stocktake using multiple bin locations:
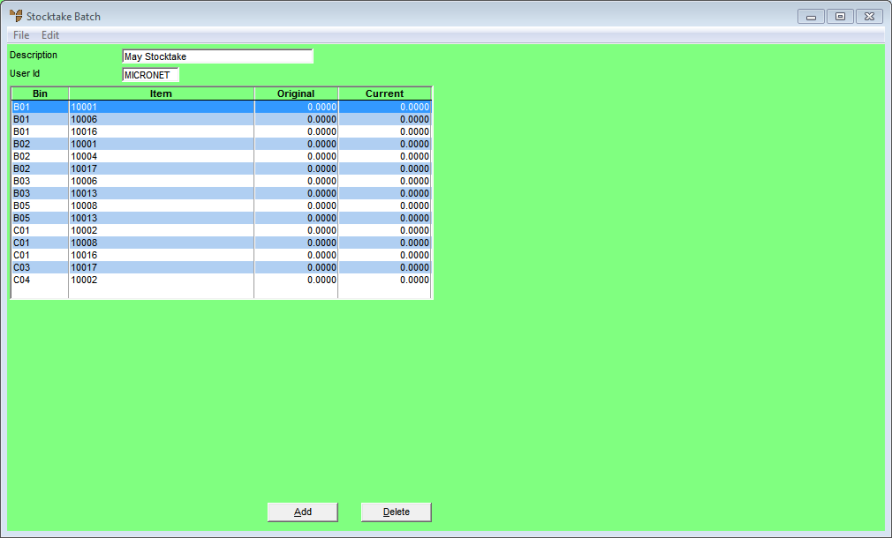
- Display the Stocktake Batch screen showing all the items in bin location order.
Refer to "Creating a New Stocktake Batch" or "Recalling a Stocktake Batch".
- Double click on an item that you want to edit, or select an item and then press Enter.
Micronet displays the Edit Bin Qty screen over the top of the Enter Stocktake Line screen.

- Complete the following fields:
|
|
Field
|
Value
|
|
|
Bin Location
|
Micronet displays the bin location of the selected item.
|
|
|
Original Qty
|
Micronet displays the quantity of the item in that bin location when the batch was first created.
|
|
|
New Quantity
|
Enter the actual stocktake count quantity for that bin location.
|
- Select the Accept button.
Micronet saves the count quantity and redisplays the Enter Bin Qty screen with the next bin location and item in the stocktake batch.
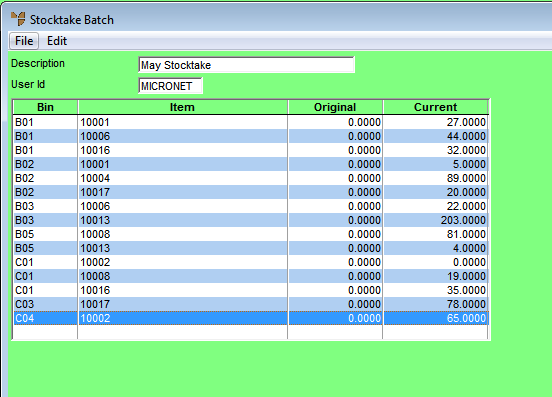
- Continue entering the count quantities for each bin location and item in the batch.
When you have finished entering the stocktake count quantities for every item in the batch, Micronet redisplays the Stocktake Batch screen.
|
|

|
Technical Tip
You can also select the Cancel button to close the Enter Bin Qty screen at any time and then select FILE | HOLD to save your changes to that point. This allows you to continue entering the stocktake counts at a later time.
|
- You can add items to the batch by selecting the Add button.
Micronet displays the Enter Stocktake Line screen.
- In the Item Number field, enter the ID of the item to be added to the stocktake batch, or press Tab or Enter to select an item.
Micronet loads the current stock details for the item. Only quantities that are currently recorded in the bin range for the stocktake batch are pre-loaded.
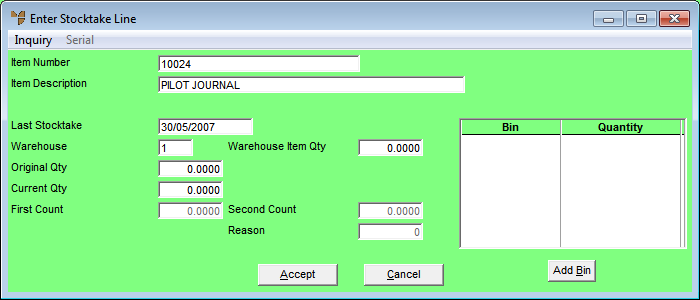
- Select the Add Bin button.
Micronet displays the Edit Bin Qty screen.
- Complete the fields on this screen as above, entering the bin location for the item as well as the quantity.
- Select the Accept button.
Micronet redisplays the Edit Bin Qty screen so you can enter more bin locations for the item.
- When you have finished entering bin locations, select Cancel.
Micronet redisplays the Enter Stocktake Line screen, adding the new item and bin locations to the stocktake batch.
- When you have finished with the Enter Stocktake Line screen, select Cancel.
Micronet redisplays the Stocktake Batch screen.
You should now add any smaller batches to the master batch if required, print a Stocktake Processing Report, create a variance batch if required, and then post the batch.